No-dig gardening is one of the easiest ways to grow a healthier, more productive garden without making the process harder on yourself or the soil. Instead of turning and disturbing the ground every season, this method focuses on feeding the surface, protecting soil life, and letting the structure improve naturally over time. It is simpler than it sounds, and for beginners, that simplicity is often the biggest advantage.
What makes no-dig gardening so appealing is that it helps the garden look better and work better at the same time. Beds stay tidier, weeds become easier to manage, moisture is held more effectively, and the soil gradually becomes richer and more alive. These tips are designed to make the method feel approachable from the start.
Why no-dig gardening works so well for beginners
- It improves soil structure without the extra labor of constant digging
- Surface layers of compost and mulch help reduce weeds and conserve moisture
- Soil life stays more active when the ground is disturbed less often
- The process is easy to build gradually, even in a brand-new garden
1. Start by layering organic matter on top
One of the core ideas in no-dig gardening is that you build fertility from the surface downward. Layers of compost, leaf mold, aged manure, or other organic matter feed the soil over time and create a rich planting zone without the need to mix everything in. This is why people often describe the method as lasagna gardening.
For beginners, this is a very reassuring place to start because it turns soil improvement into an additive process rather than a disruptive one. You are not trying to fix everything at once. You are steadily building better ground from above.
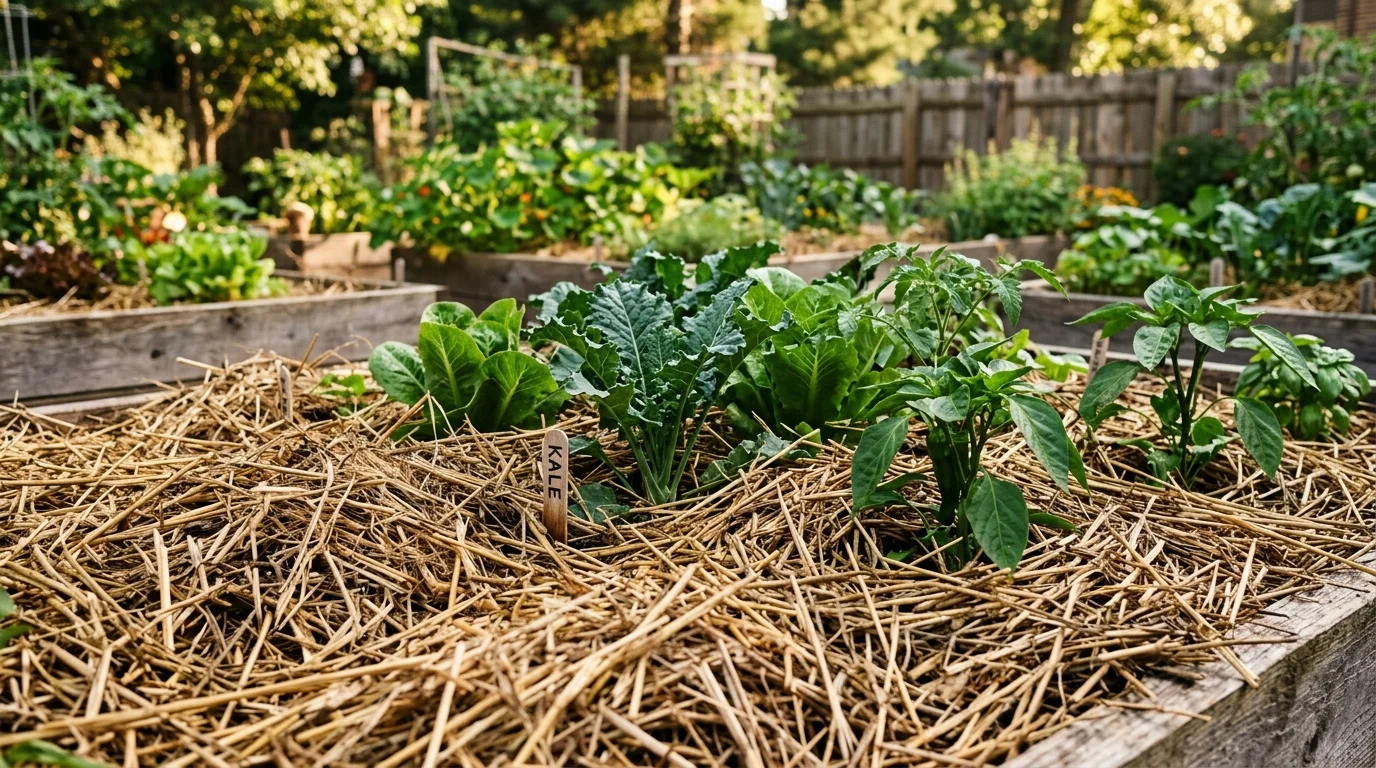
2. Mulch thickly to protect the soil surface
Mulch is one of the most useful tools in a no-dig garden because it covers bare soil, reduces weed pressure, and slows down moisture loss. A generous mulch layer helps the whole bed feel calmer and more stable, especially during warmer weather when the ground dries quickly.
It also improves the look of the space. Fresh mulch makes even a new garden bed look more finished and intentional, which is part of why no-dig beds often feel so tidy.
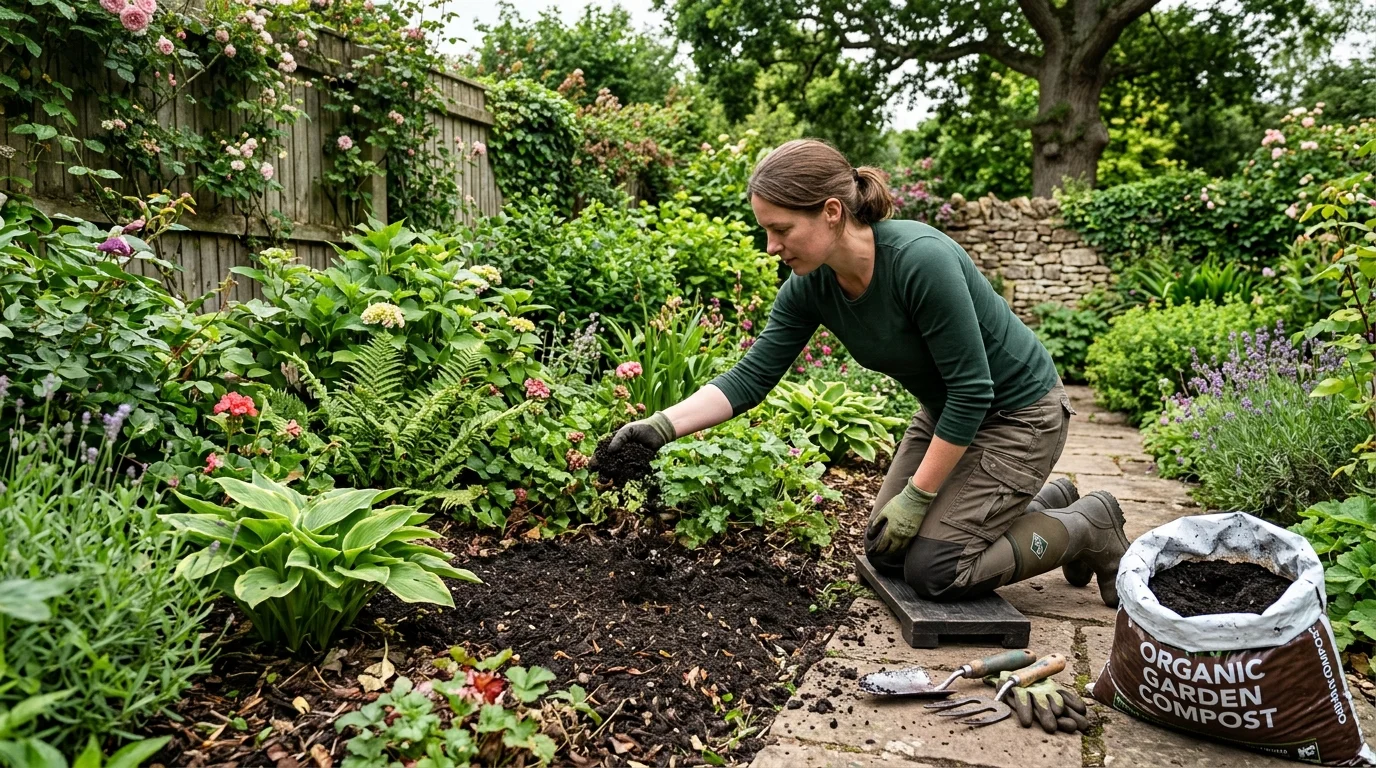
3. Use compost as a regular top dressing
Instead of digging compost into the soil, no-dig gardeners usually spread it over the surface. This top dressing gradually feeds the bed while allowing soil organisms and natural processes to do the work of moving nutrients downward. It is simple, gentle, and highly effective.
For a beginner, this makes seasonal care feel much more manageable. Rather than turning the whole bed, you just keep adding nourishment to the surface and let the system improve over time.
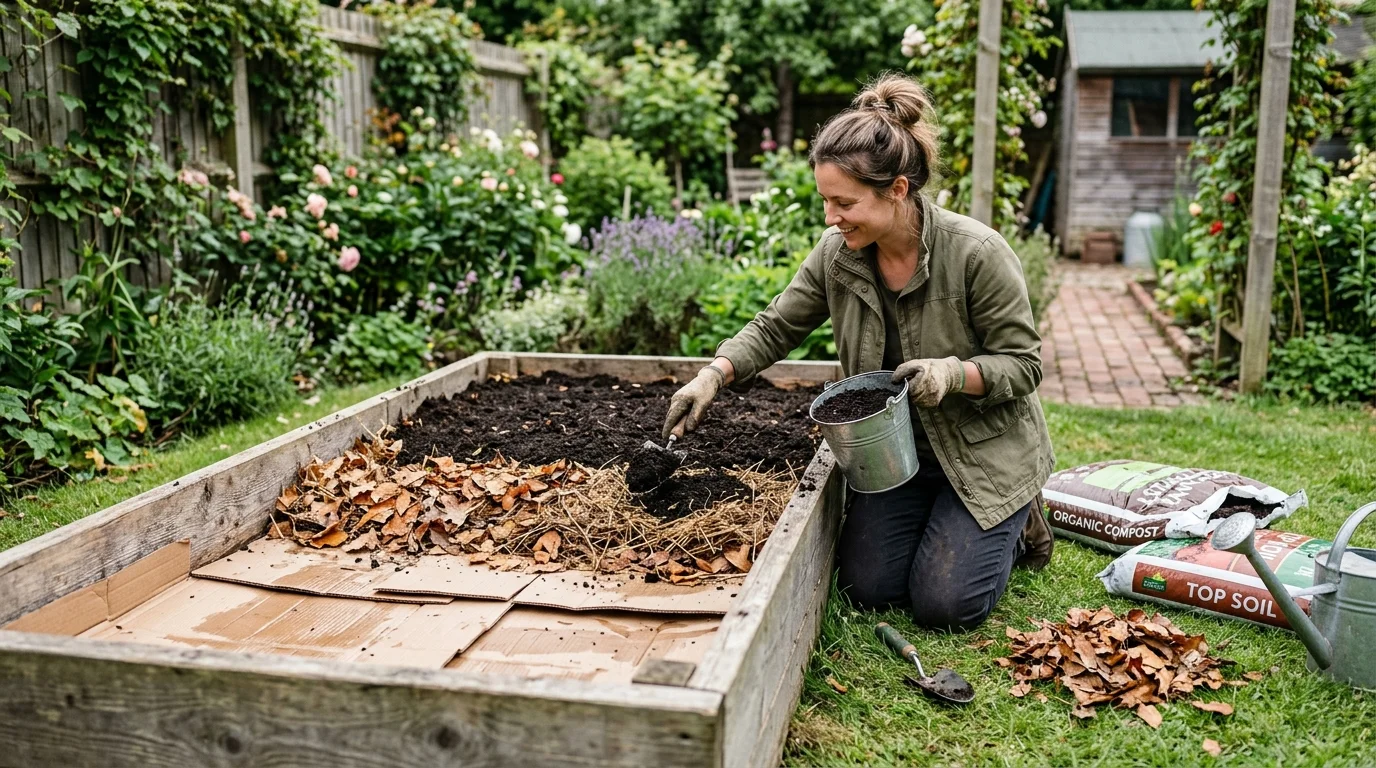
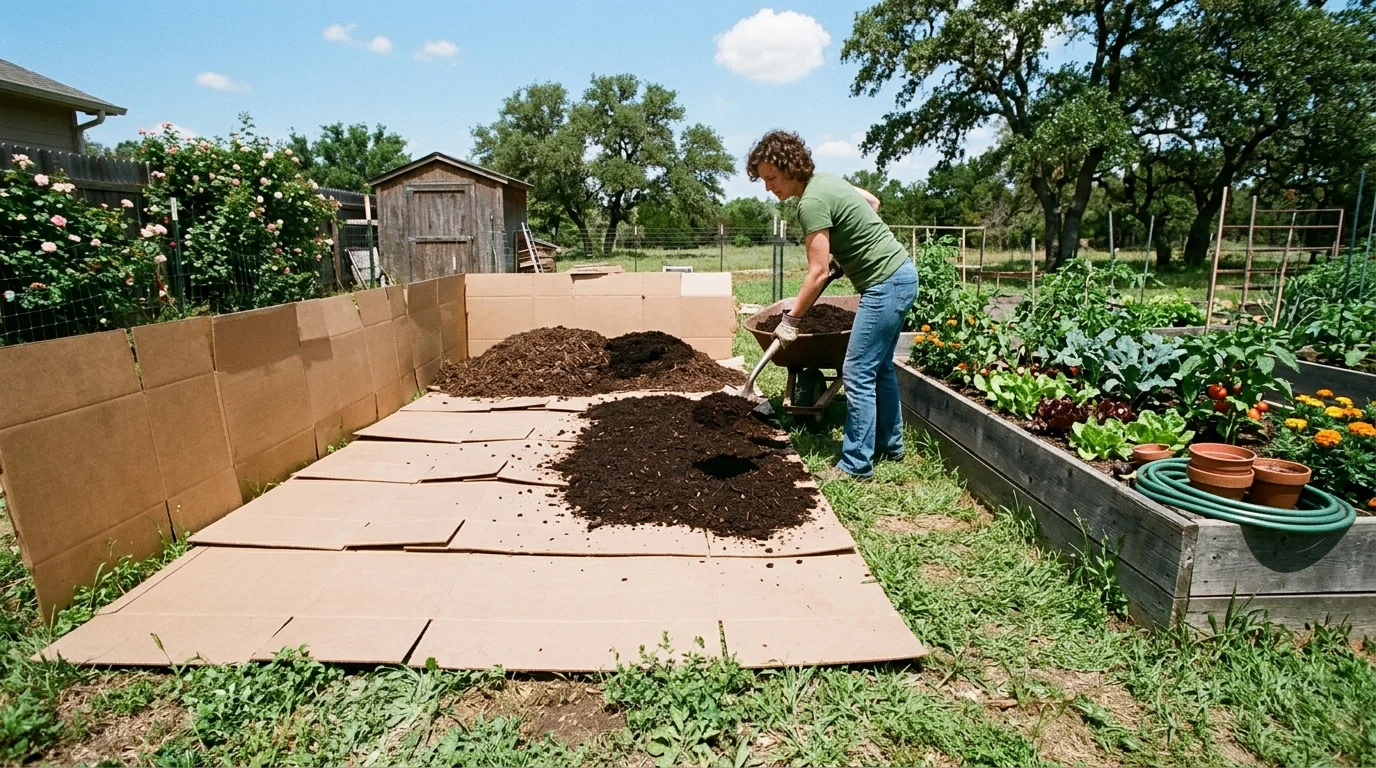
4. Use cardboard as a weed-suppressing base layer
Cardboard is a practical way to begin a new no-dig bed, especially over grass or a weedy patch. It blocks light, helps suppress unwanted growth, and breaks down gradually beneath the compost and mulch above. This is one of the easiest ways to turn an unused area into a workable growing space.
The important part is to keep the cardboard plain and overlap the pieces well so weeds are properly covered. Once topped with organic matter, it becomes part of a clean and effective no-dig setup.
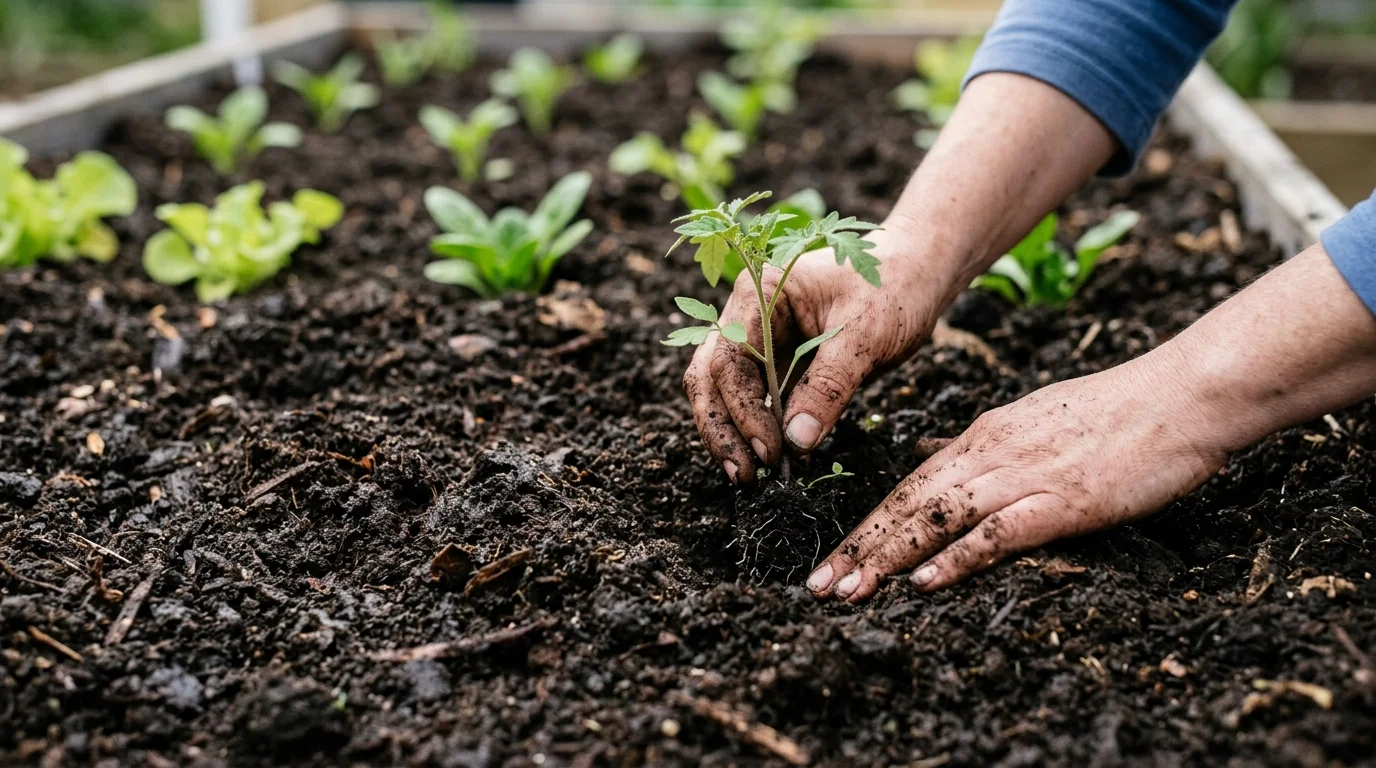
5. Plant directly into compost for an easy start
One of the most satisfying things about a no-dig bed is that you can often plant straight into the compost layer. Seedlings, transplants, and some direct sowing can all work beautifully when the surface is rich and well prepared. This makes the method especially accessible for beginners who want quick results.
It also creates a strong visual shift. The bed starts to feel productive early on, which builds confidence and makes the whole process easier to keep up with.
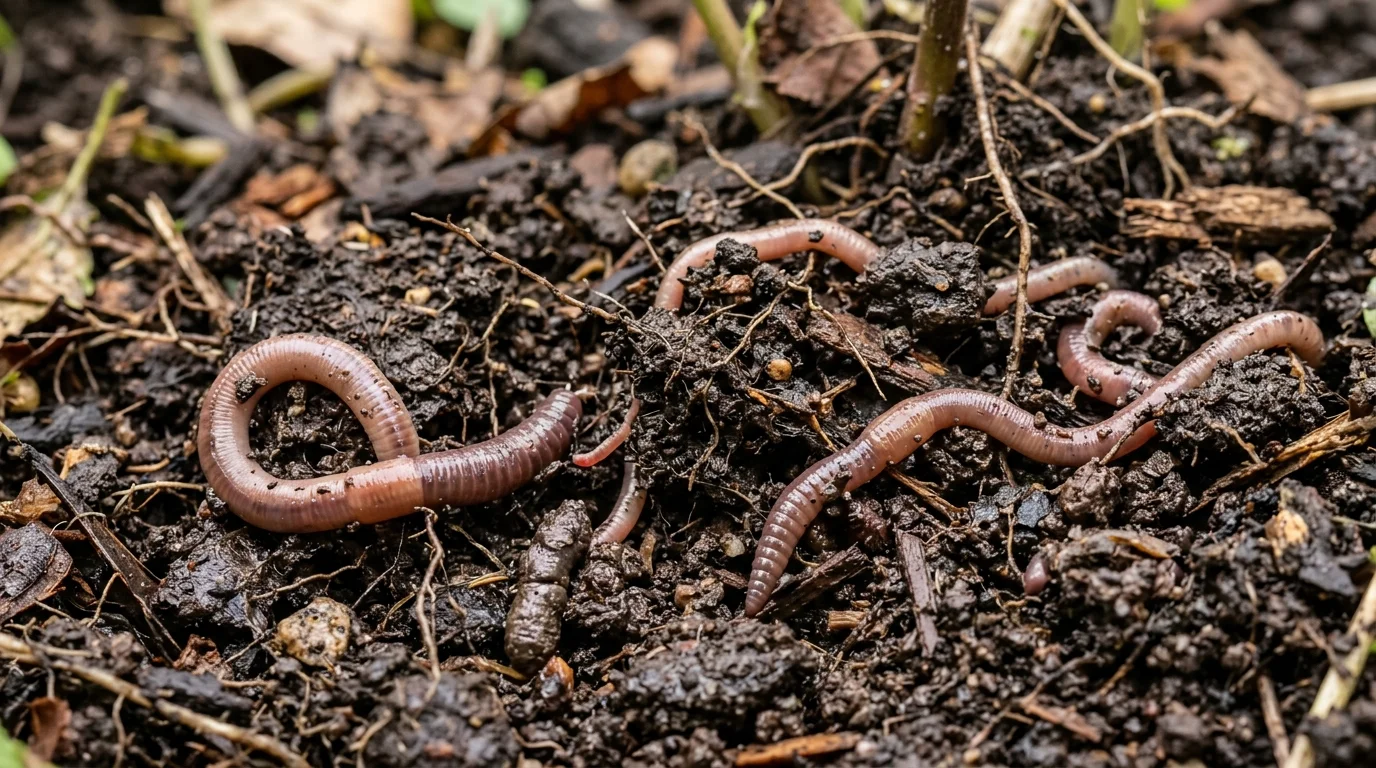
6. Let soil life do more of the work
Healthy no-dig soil is usually full of worms and other beneficial organisms. These are signs that the ground is active, aerated, and processing organic matter naturally. Instead of digging to force change, the goal is to create conditions where soil life improves structure for you.
This is one of the most rewarding parts of the method. Over time, the bed becomes looser, darker, and more fertile with much less physical effort.
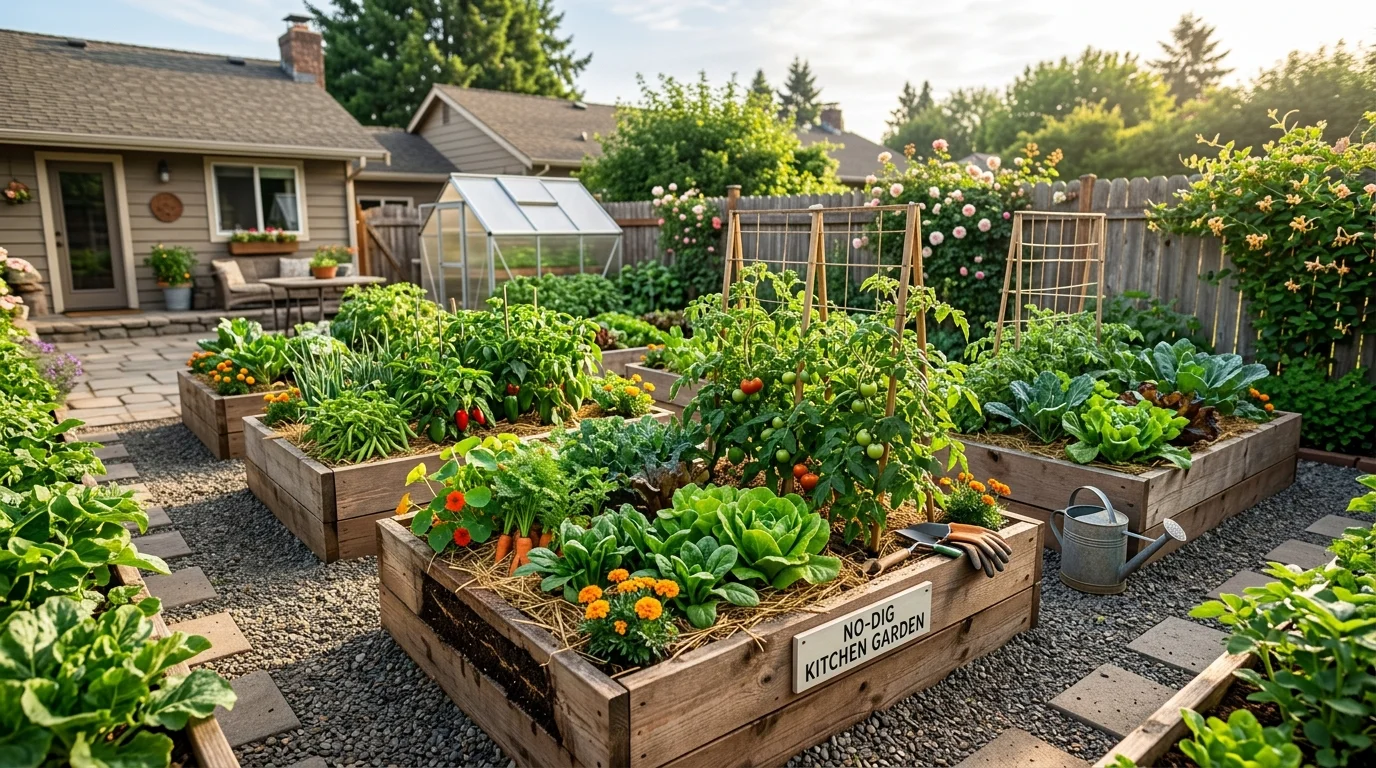
7. Use raised beds if you want more definition
No-dig gardening works both in-ground and in raised beds, but raised beds can make the process feel even easier for beginners. They define the growing space clearly, help keep pathways separate, and make it simpler to build up layers of compost and mulch in a controlled way.
They also bring structure to the overall garden design. A set of neat no-dig raised beds often looks highly organized from the very beginning.
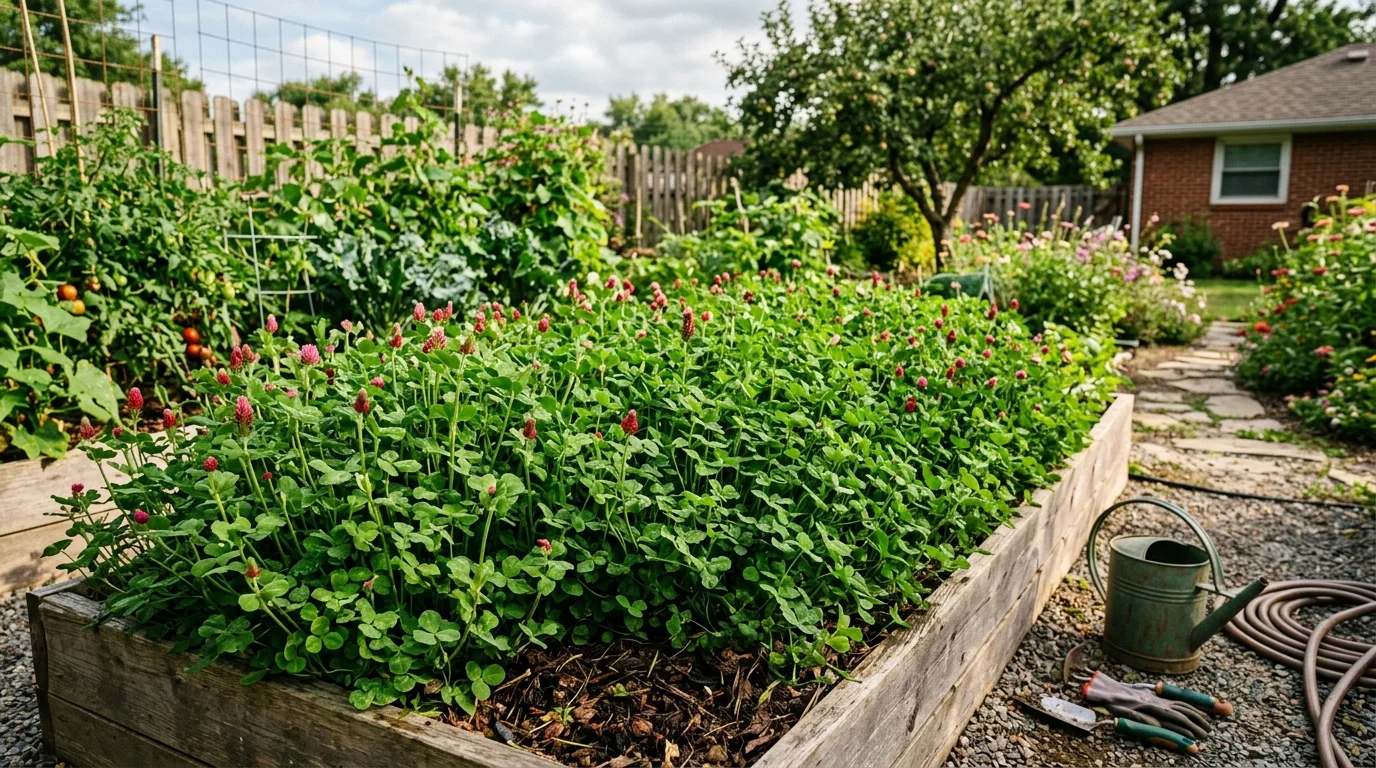
8. Grow green manures to feed the bed naturally
Green manures, also called cover crops, are a useful way to protect and improve bare soil between growing seasons. They help cover the surface, reduce erosion, and add organic matter back into the system. In a no-dig approach, they support soil health without needing the ground to be turned over.
For beginners, this is a smart way to keep the bed working even when you are not actively harvesting from it. The soil stays covered, active, and better prepared for the next crop.
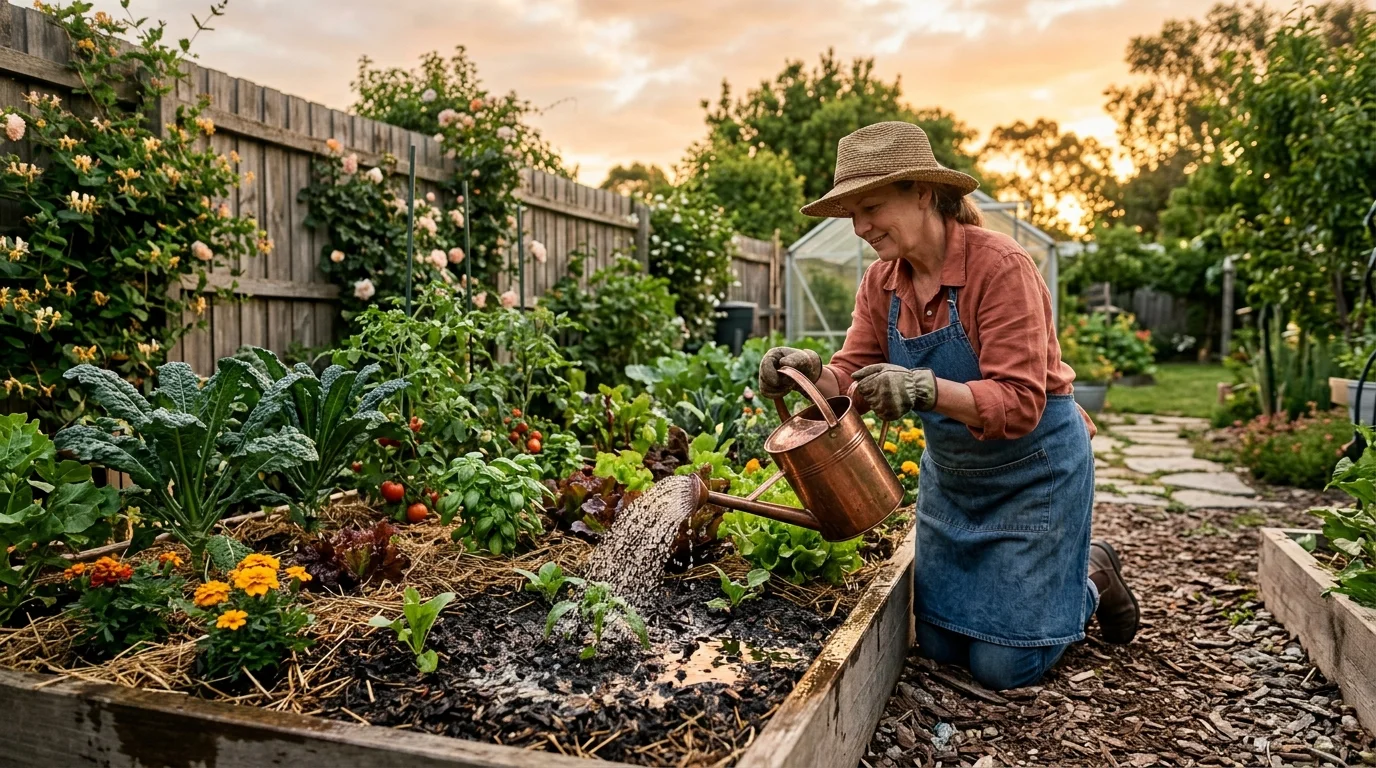
9. Water gently so the layers stay stable
Because no-dig beds are built from layers, watering should support the structure rather than wash it around. A steady, gentle watering routine helps moisture soak downward while keeping the mulch and compost surface in place. It also encourages roots to settle into the bed more evenly.
This is especially important when the bed is newly built. Consistent moisture helps all those surface layers begin working together as one living system.
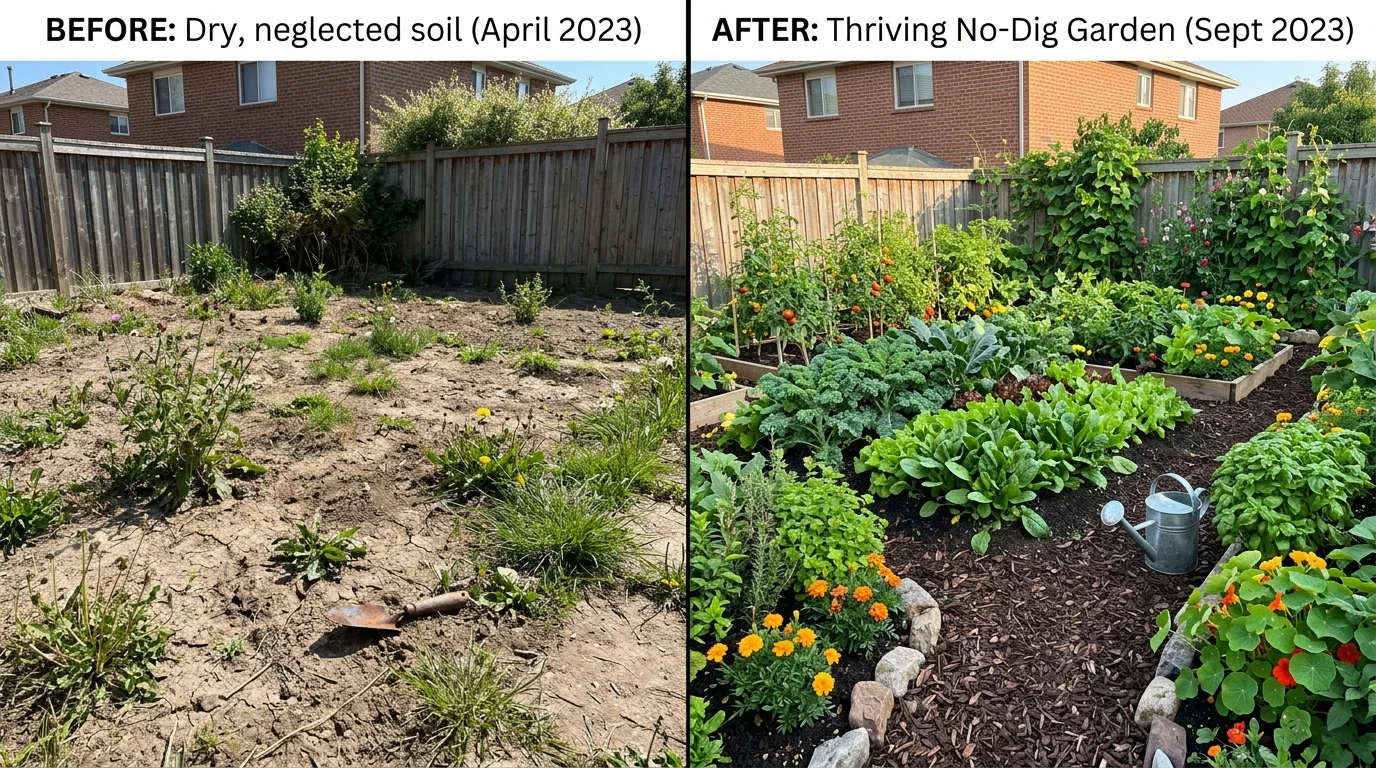
10. Notice how quickly the garden begins to change
One of the best things about no-dig gardening is how visible the improvement can be. Beds often look tidier, richer, and more productive in a surprisingly short time. The before-and-after difference is not just visual. The soil starts to behave differently too, becoming easier to work with and more resilient.
That visible progress is often what helps beginners stick with the method. It feels rewarding quickly, which makes it easier to keep building on.
11. Reuse kitchen scraps thoughtfully
Kitchen scraps can support a no-dig system when they are composted properly or added in a way that feeds the soil without creating mess or pest problems. The main idea is to keep valuable organic material cycling back into the garden instead of sending it away as waste.
This reinforces one of the best parts of no-dig growing: the garden becomes a quieter, smarter system where waste is reduced and fertility is steadily rebuilt.

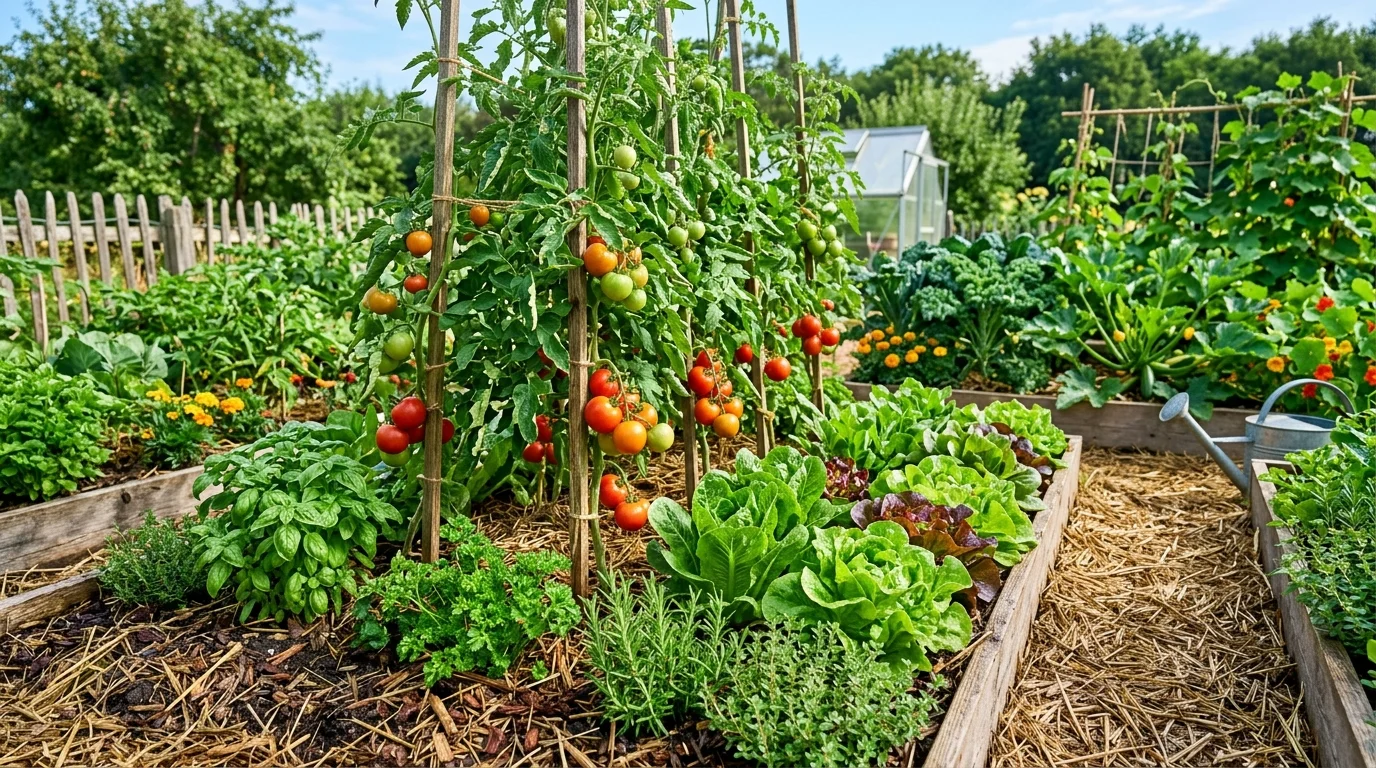
12. Aim for a thriving vegetable garden, not perfect soil overnight
No-dig gardening is not about getting instant perfection. It is about building better soil steadily enough that the plants respond year after year. As the compost layers deepen, the mulch protects the surface, and soil life becomes more active, the whole vegetable garden starts to feel stronger and easier to manage.
That is what makes the method so beginner-friendly. It replaces heavy effort with consistent, practical care that leads to healthier soil and better harvests over time.
Final thoughts on no-dig gardening tips for beginners
If you are new to growing food, no-dig gardening is one of the most forgiving and rewarding ways to start. You do not need to fight the soil into shape. You simply keep feeding the surface, protecting it, and letting natural processes do more of the work.
Start with one bed, use generous compost and mulch, and focus on steady improvement rather than instant perfection. Over time, that simple rhythm builds the kind of rich, healthy soil that makes the whole garden easier and more productive.