A gravel path can completely change how a garden feels. It gives structure to loose planting, makes the layout easier to read, and adds that finished, intentional quality that turns an ordinary outdoor space into something far more polished. When it is done properly, it looks effortless. When it is rushed, it quickly feels uneven, messy, and temporary.
The good news is that building a gravel pathway is one of the most achievable garden upgrades if you approach it in the right order. The secret is not expensive materials or complicated tools. It is careful planning, a solid base, clean edges, and a design that suits the style of the garden around it. These ideas walk through the full process so the final result feels practical, durable, and professional.
What makes a gravel pathway look professionally done
- A clear route that feels natural in the garden instead of forced
- Strong base preparation so the path stays level and drains well
- Crisp edging that keeps gravel from drifting into borders and lawn
- Gravel depth and texture that feel even, comfortable, and intentional
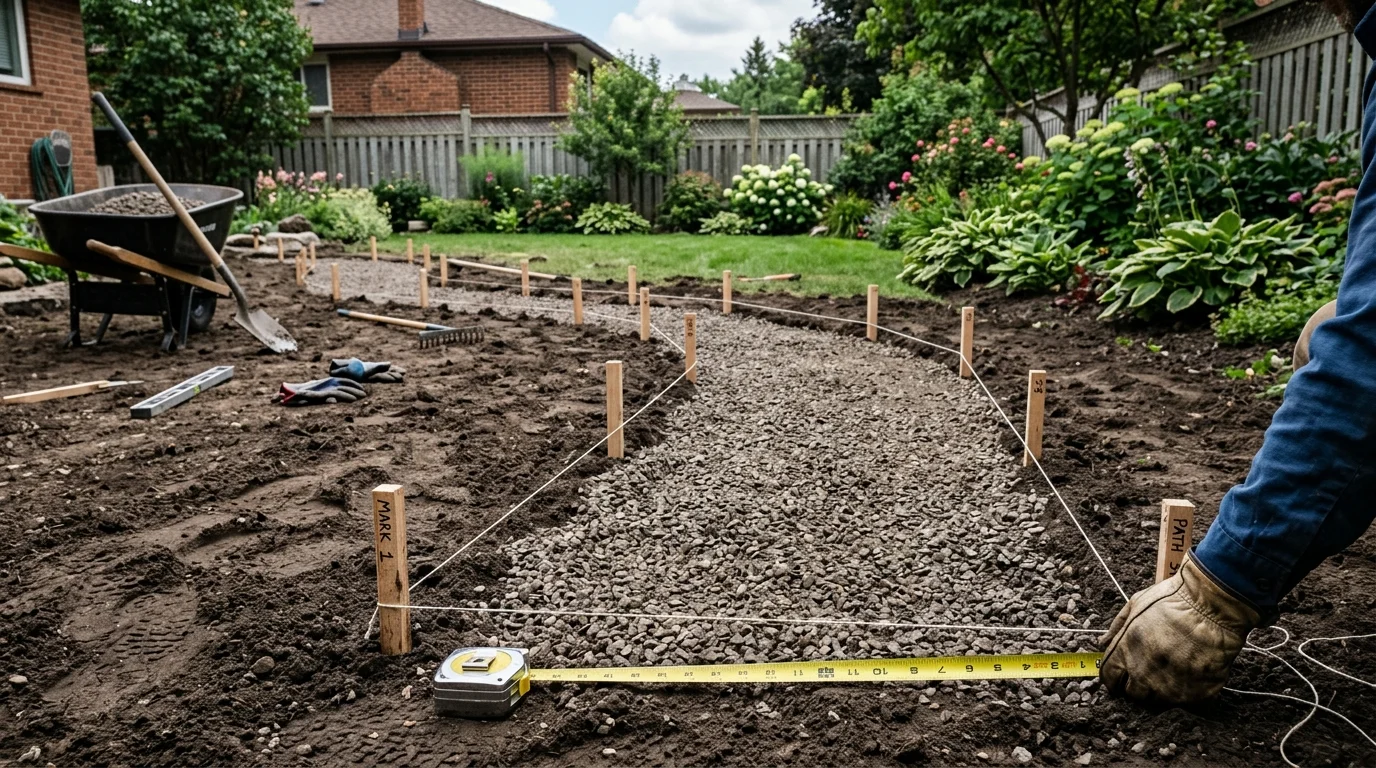
1. Plan the path layout before moving any material
The layout stage matters more than most people expect. A good gravel path should guide movement naturally and connect parts of the garden in a way that feels obvious once it is there. Think about where people actually walk, how wide the route needs to be, and whether a straight line or a softer curve makes more sense for the space.
Marking the path before you dig helps you judge scale properly. It also lets you step back and check whether the route feels balanced against patios, beds, fences, or lawn. A few adjustments at this stage can save a lot of frustration later.
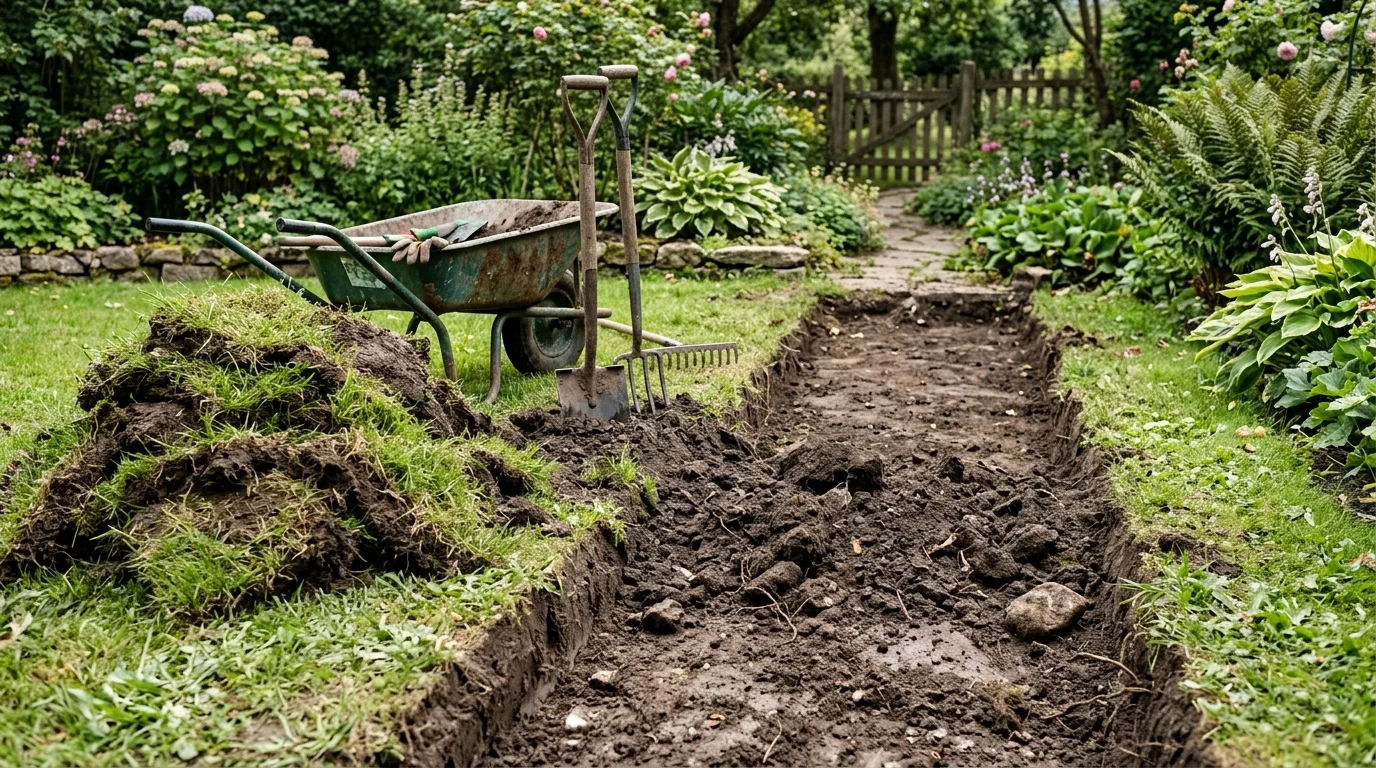
2. Prepare the ground so the path stays stable
Ground preparation is what separates a lasting path from one that sinks, shifts, or becomes patchy after the first season. Remove turf, weeds, and loose surface material so you are working with a clean, defined shape. The path should be excavated enough to hold the base and top gravel layer without sitting awkwardly above the surrounding garden.
This step may not be the most glamorous, but it creates the foundation for everything that follows. If the ground is uneven now, the finished path will still show it later.
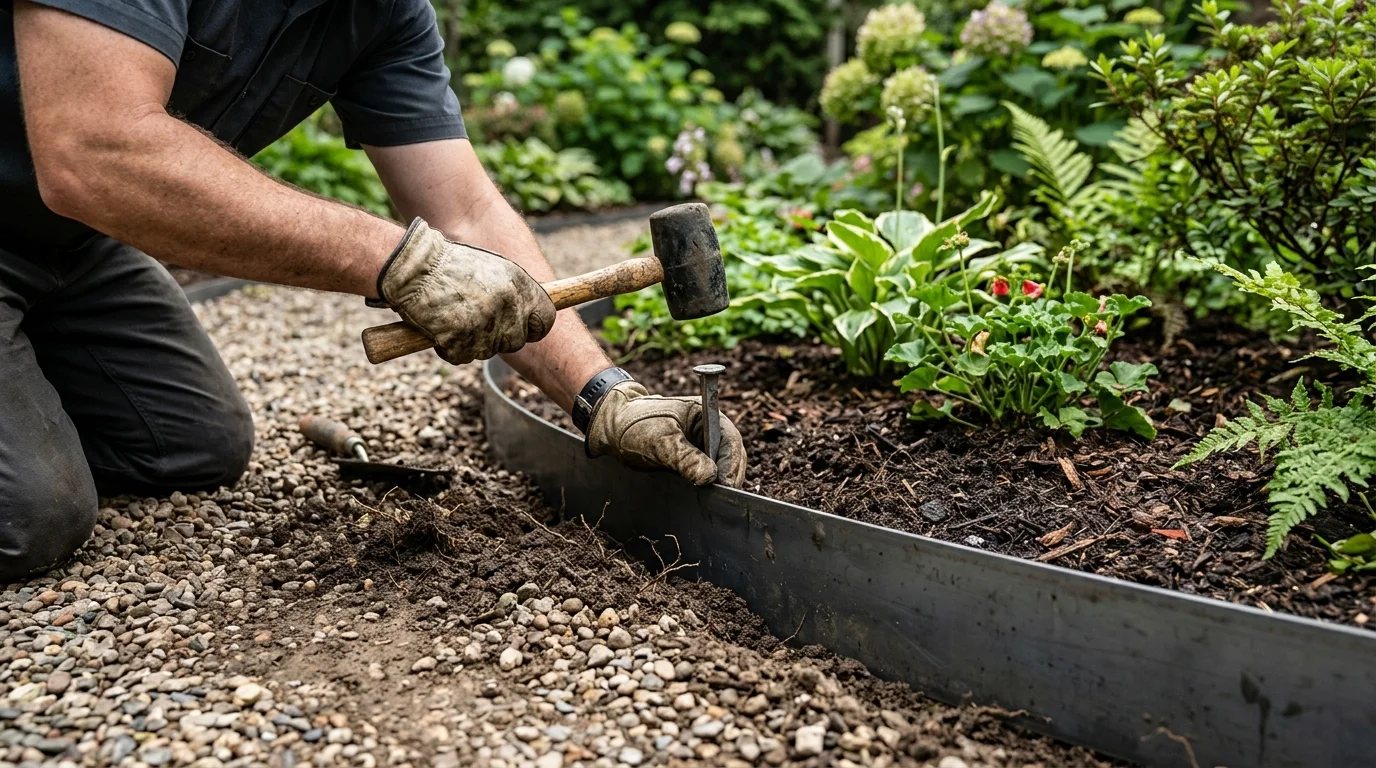
3. Install edge borders for a crisp and controlled finish
Edging gives a gravel pathway definition. Without it, the line can soften too much and gravel will gradually migrate into flower beds, grass, or surrounding paving. A clean border keeps the design looking intentional and helps the path hold its shape over time.
The best edging style depends on the look you want. Metal feels sleek and modern, timber can feel softer and more rustic, and stone often works beautifully in traditional gardens. Whatever material you choose, the important part is consistency and a neat line.
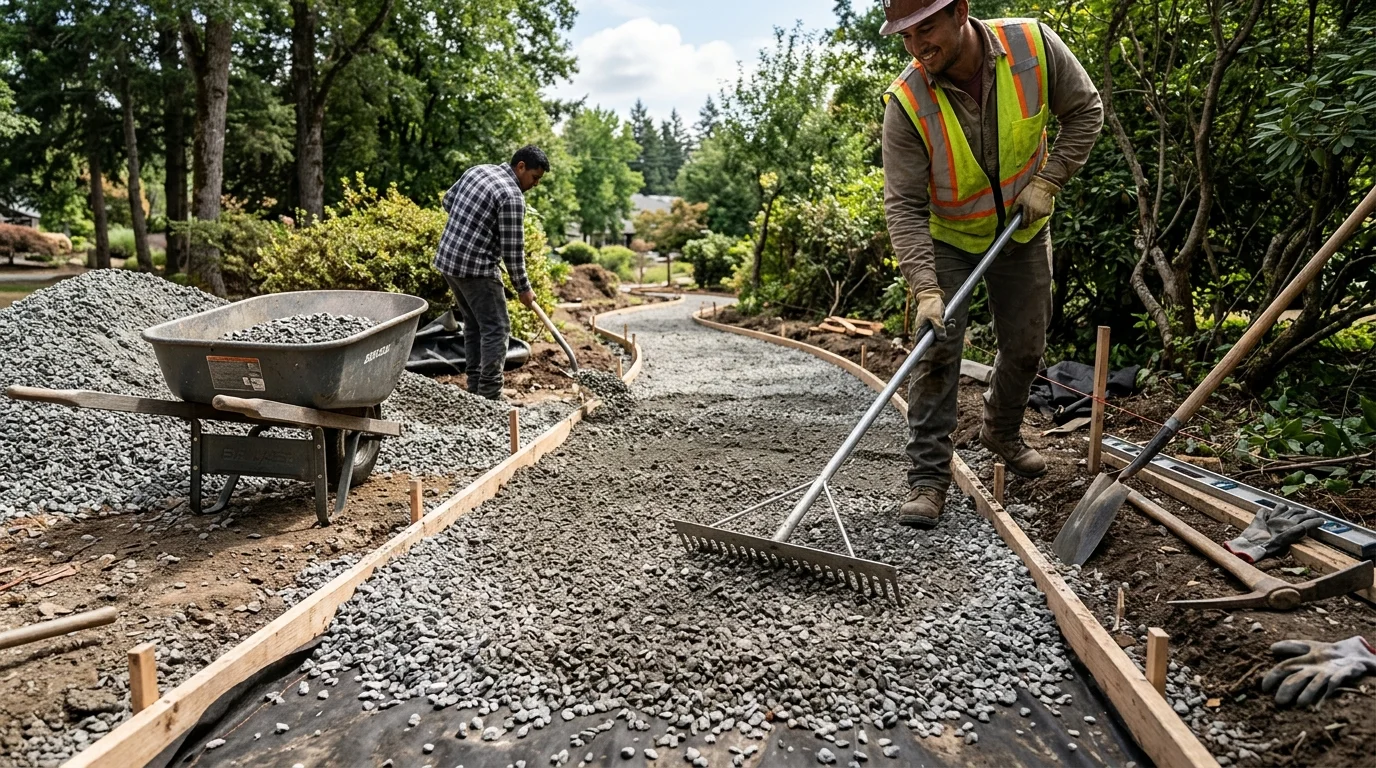
4. Lay a proper base layer for strength and drainage
The base layer does most of the heavy lifting. It supports the gravel above, helps the path drain well, and stops the surface from becoming unstable underfoot. Crushed stone or a similar compactable material is usually the right choice because it locks together and creates a dependable foundation.
Spread the base evenly and pay attention to depth across the whole route. This is especially important on longer paths, where even a small inconsistency can make the finished result look uneven.
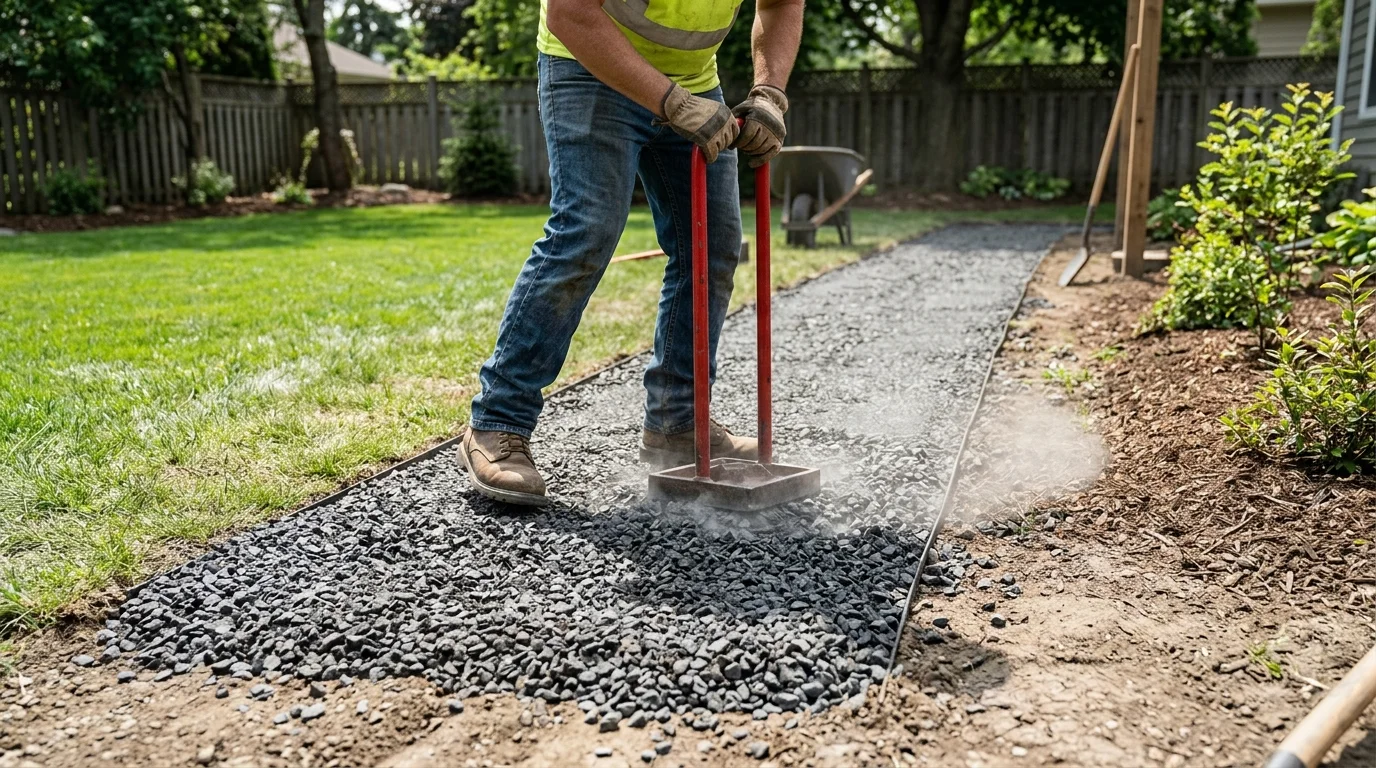
5. Compact the base to avoid movement later on
Compacting is the step that makes the path feel solid instead of makeshift. Once the base is down, it needs to be pressed firmly so it settles into a stable layer that can support foot traffic and changing weather. Skipping or rushing this step often leads to dips, puddles, or loose sections that never feel quite right.
Take the time to compact thoroughly, especially if the path will be used often. A well-compacted base immediately improves the feel of the project and makes the final gravel layer easier to spread evenly.
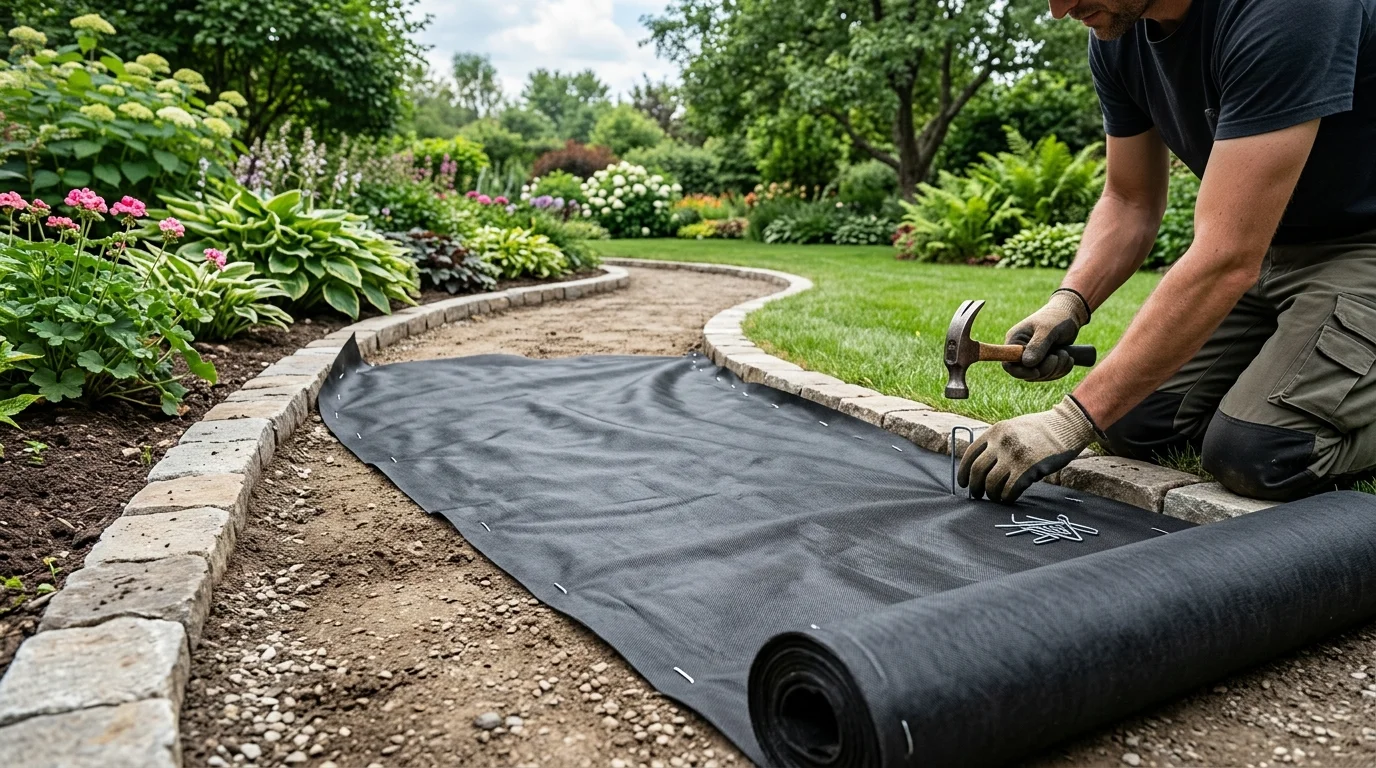
6. Add landscape fabric to reduce weed problems
Landscape fabric is not there to replace the base. It is there to help reduce weed growth and keep the gravel layer better separated from the ground below. Used correctly, it makes long-term maintenance easier and helps the surface stay cleaner.
It should sit flat, overlap neatly where needed, and follow the shape of the path without bunching. A tidy installation here makes the whole project feel more professional and saves effort later.
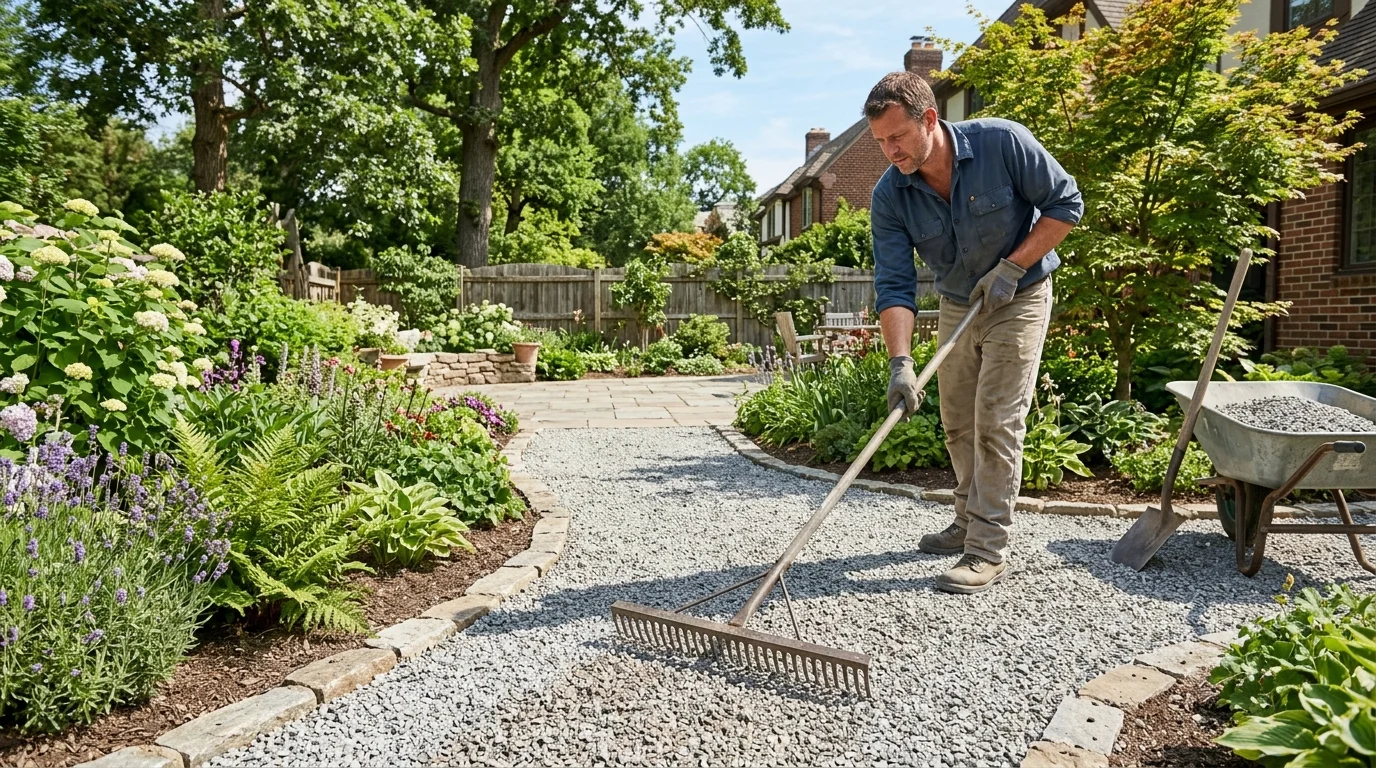
7. Spread the gravel evenly for the final surface
This is the moment the pathway starts to look real. Once the top gravel goes down, the route becomes visually finished and the whole garden begins to read differently. The key is to spread it evenly so the texture feels consistent, comfortable to walk on, and visually calm.
Choose gravel that suits the style of the house and garden. Some spaces look better with a softer natural tone, while others suit a brighter or more modern aggregate. The best choice is usually the one that complements the wider landscape rather than fighting it.
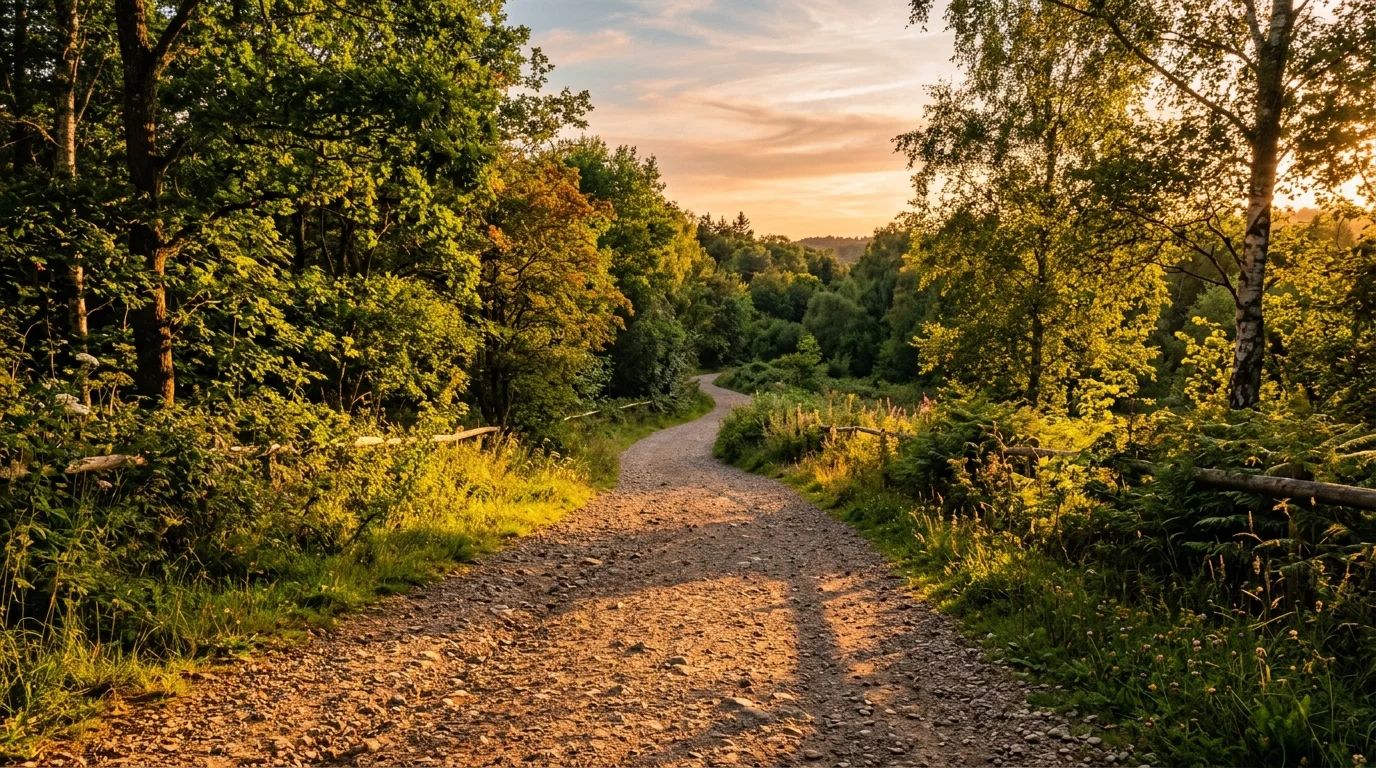
8. Use curves when you want the path to feel softer
A curved gravel path can make a garden feel more relaxed, layered, and inviting. It slows the eye slightly and creates a sense of movement through the space, which works especially well in planting-heavy gardens or layouts that want to feel more natural than formal.
Curves still need discipline, though. The line should feel purposeful rather than random. Gentle, confident bends almost always look stronger than fussy twists.
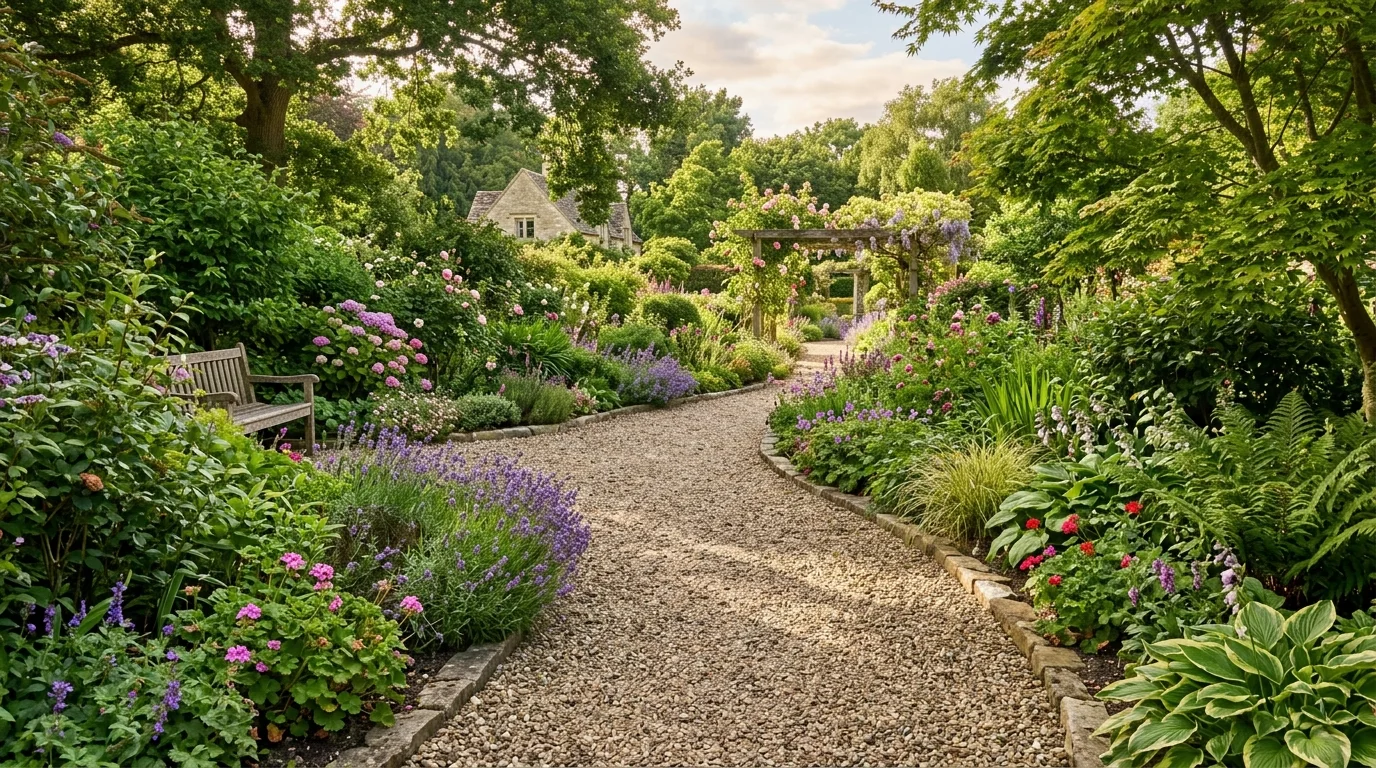
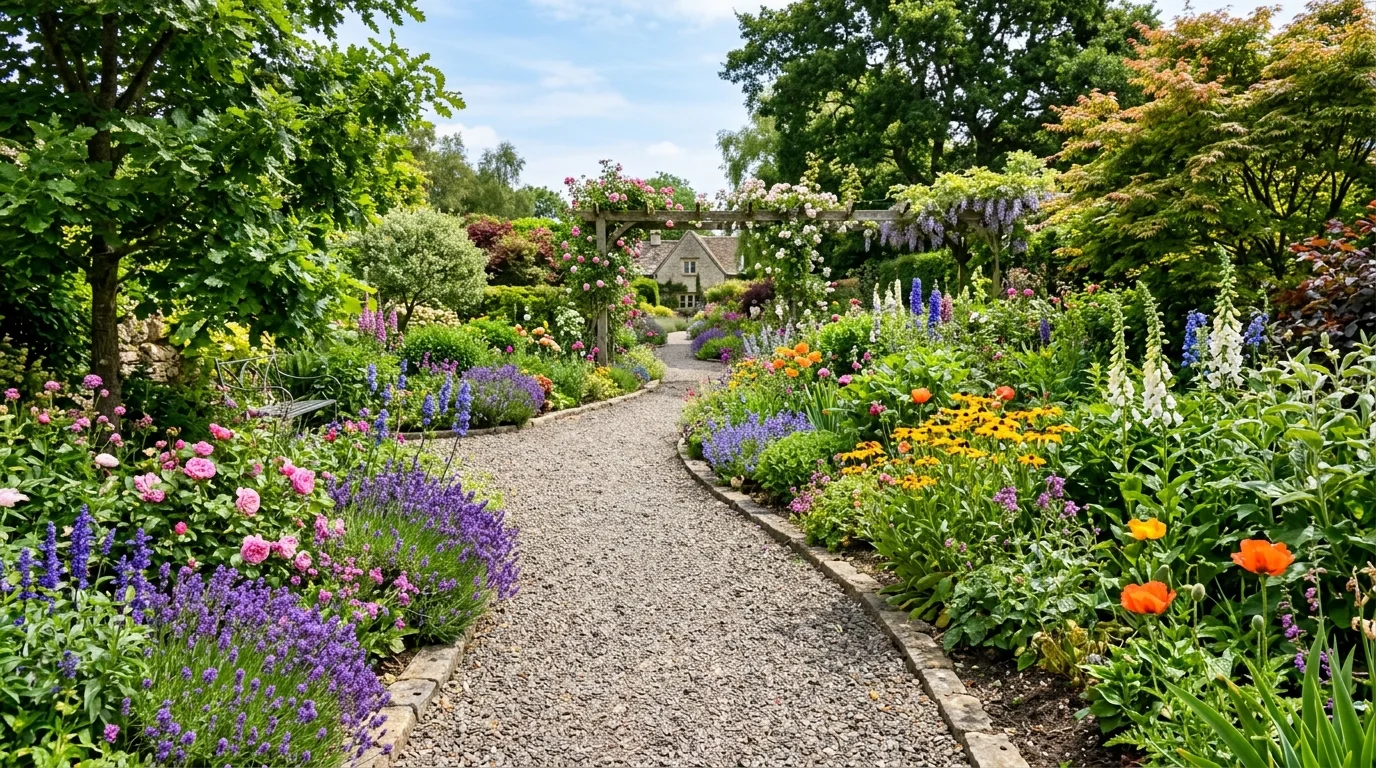
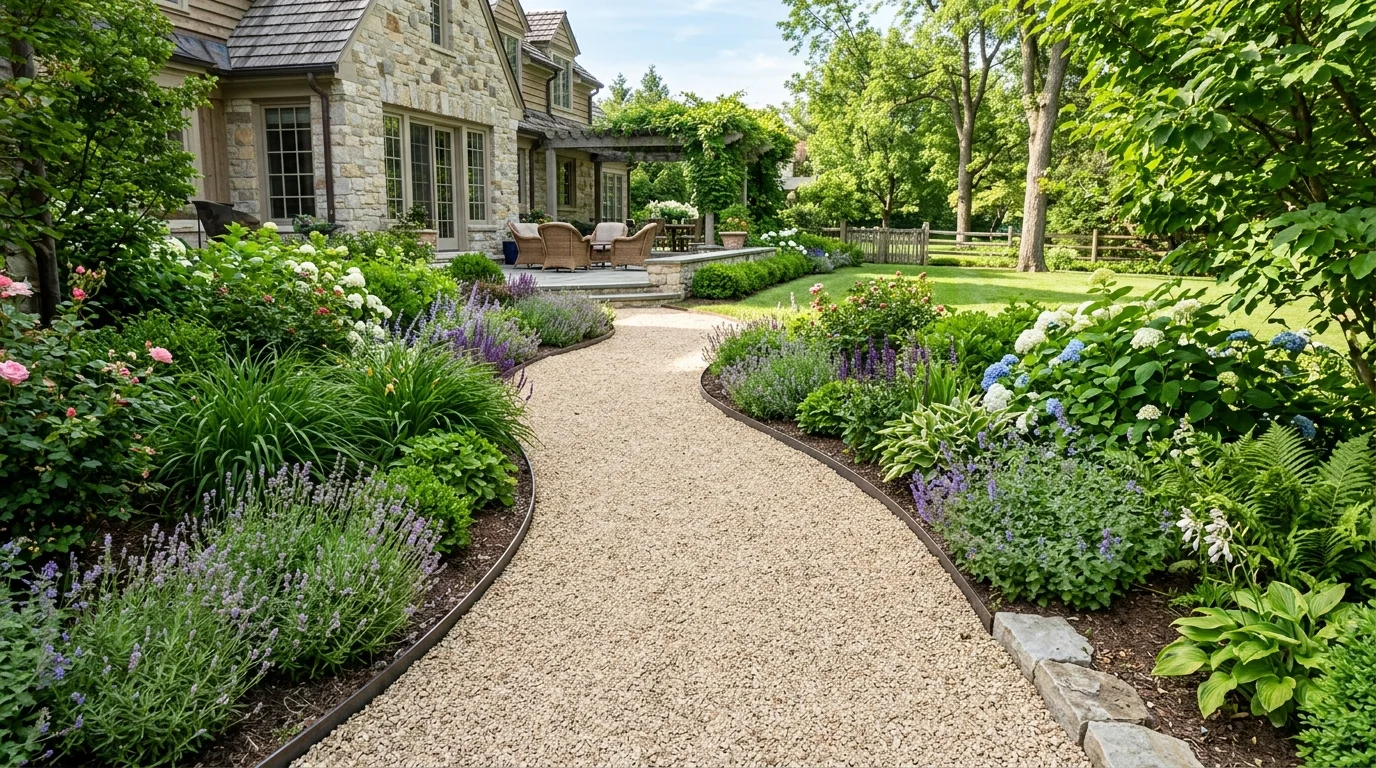
9. Soften the edges with planting for a richer look
One of the easiest ways to elevate a gravel path is to think about what happens beside it. Flower borders, low grasses, herbs, or soft perennials can make the pathway feel integrated instead of isolated. The contrast between structured gravel and looser planting is what gives the design its charm.
This does not mean letting plants swallow the route. The path should still read clearly. A little softness at the edge is enough to make the whole feature feel warmer and more atmospheric.
10. Keep the design minimal if you want a modern finish
Gravel pathways can feel very contemporary when the palette is restrained and the detailing is clean. Simple edging, a controlled planting scheme, and a neutral gravel color help the path feel calm, architectural, and quietly luxurious.
This approach works especially well in small urban gardens, courtyard layouts, and newer homes where the surrounding design is already quite clean. A minimal path can still feel warm. It just relies on precision rather than abundance.

11. Think about how the path looks in changing light
The most attractive paths work all day, not just at noon. Gravel catches light beautifully, and that can make the route feel especially atmospheric in early morning or late afternoon. Warm light brings out texture, tone, and shadow in a way that makes even a simple path feel elevated.
This is worth remembering when you choose both gravel color and nearby planting. A pathway that looks beautiful in golden hour often feels more memorable overall because it adds mood as well as function.
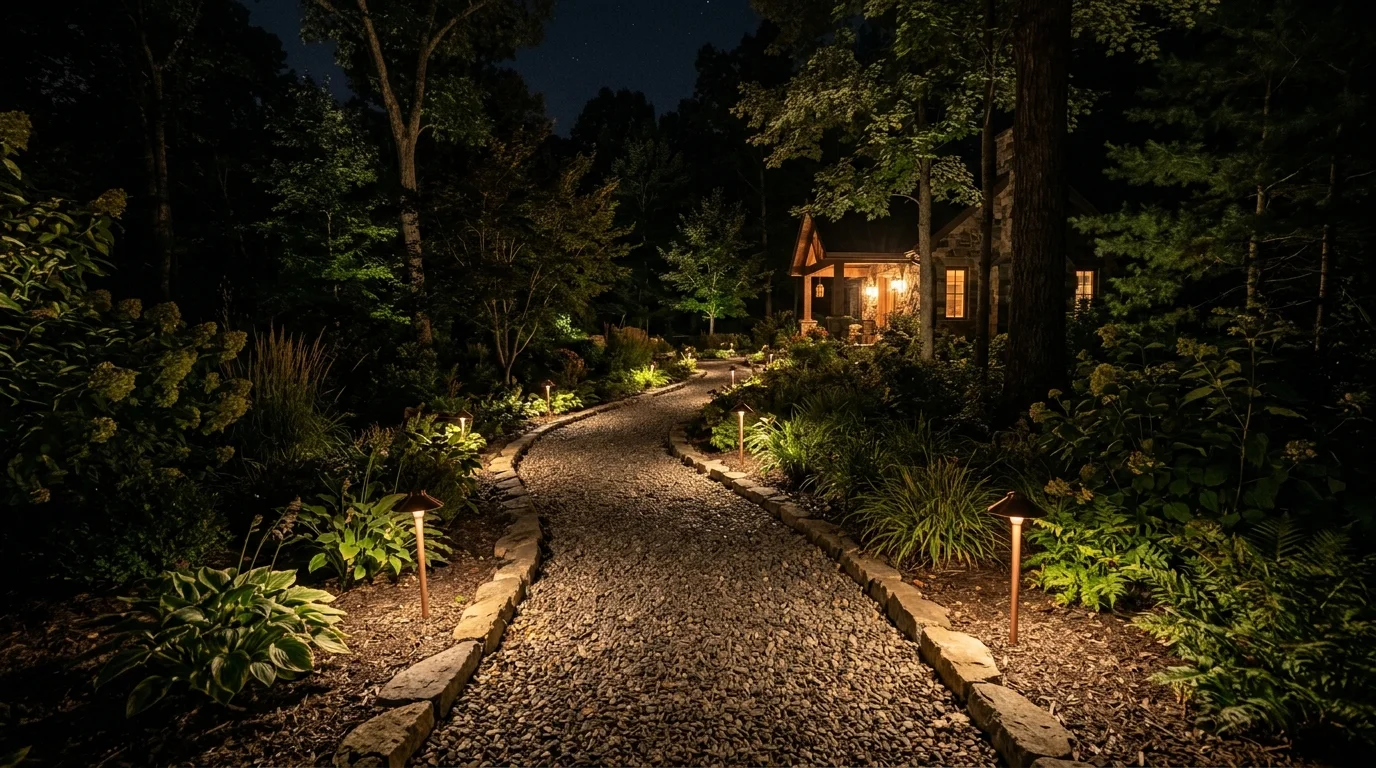
12. Add lighting if the path needs to work in the evening
If the pathway leads to a porch, seating area, shed, or side entrance, lighting can make it far more useful and attractive after dark. Soft path lighting improves safety, but it also adds atmosphere and helps the route feel finished rather than forgotten at night.
The best effect usually comes from restraint. Gentle pools of light or subtle edge illumination often look more elegant than anything too bright or overly decorative.
13. Aim for a finish that feels polished from every angle
The final look of a professional gravel path comes from all the small decisions working together. Clean edges, even gravel coverage, thoughtful planting, and a route that suits the space are what make the whole design feel resolved. It should look like it belongs there, not like an afterthought.
When those details are handled well, a gravel pathway does more than connect one area to another. It brings order, character, and a stronger sense of design to the entire garden.
Final thoughts on how to build a gravel pathway that lasts
If you want a gravel pathway to look good for more than a single season, the structure underneath matters just as much as the gravel you see on top. Start with a smart layout, prepare the ground properly, use solid edging, and build up the layers with care. That process is what creates a path that feels durable and visually finished.
The styling part comes after that. Once the structure is right, you can shape the mood with curves, planting, gravel tone, and lighting. That is when a simple garden path starts to feel like a professional design feature instead of just a practical shortcut.